Author name: mpiquet.mp@gmail.com

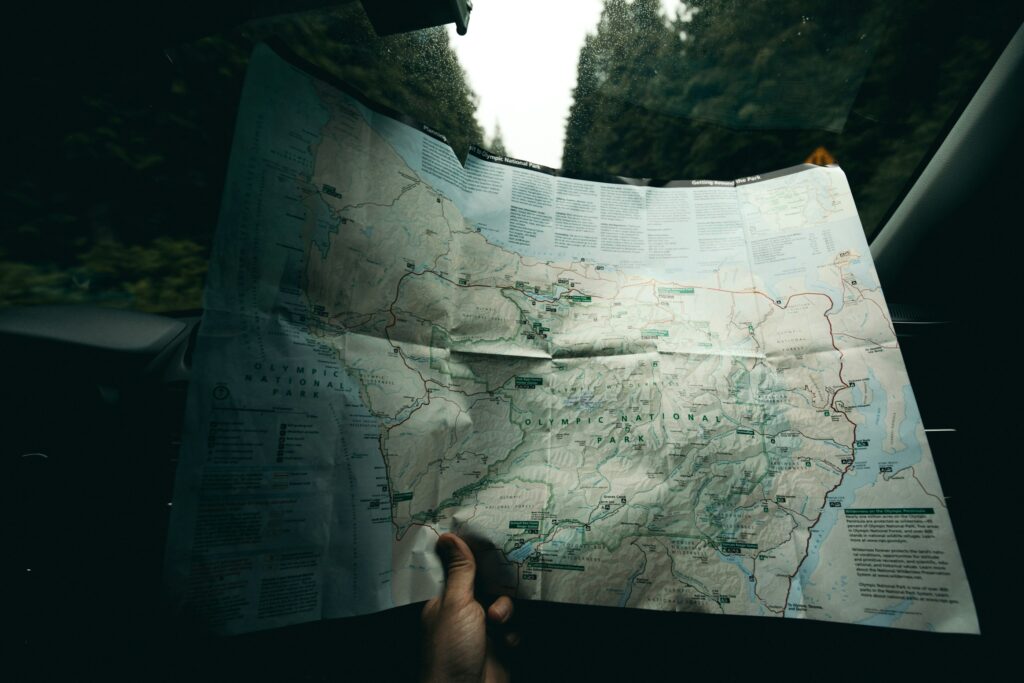
Carte papier de planification d’itinéraire de road trip tenue dans une voiture lors d’un voyage overland
Tips

How to plan a road trip : a simple method to build a realistic itinerary

A road trip itinerary is never fixed on a map. It is outlined before departure, but it mostly evolves once you are out on the road. When planning a trip, it is easy to focus on the places you want to discover. However, building a realistic itinerary requires taking many other factors into account : available time, budget, real distances, road conditions, and even the weather. With experience, we have learned that a good itinerary is not about visiting as many places as possible, but about finding the right balance between preparation and freedom of movement. Here is the method we use to plan our own road trips. Defining the framework of the trip Before even opening a map, we always start by defining the overall framework of the trip. – How much time do we actually have ? – What time of year are we leaving ? – What budget do we want to allocate to the trip ? – And most importantly, what kind of experience are we looking for ? A two-week road trip in Europe is built in a completely different way from a multi-month journey on another continent. The first usually requires a more intense pace, while the second gradually lets the environment set the rhythm. At this stage, administrative constraints also come into play : visas, insurance, border crossings, or vehicle-related documents depending on the countries visited. This initial reflection already helps avoid building an itinerary that is disconnected from reality. Listing points of interest and building a first structure Once the framework is set, we usually start by listing all the places we would like to discover. At this stage, it is not yet about building a coherent itinerary. The goal is simply to gather points of interest : national parks, tracks, cities, hikes, landscapes, or cultural sites. For this, Google Maps is often our starting point. We save locations into lists to get a global overview of the trip. And this is usually when the first reality check appears : some places are much farther apart than expected, others require significant detours, or simply do not fit within the available time. The itinerary then naturally starts to simplify. We no longer try to see everything, but to build something coherent. Checking the real feasibility of the route Once a first draft of the route is defined, we start checking whether it is actually feasible. On a map, two points can look close, but in reality they may represent a full day of driving, or even more. Road conditions, tracks, borders, or weather can completely change travel times. During a trip in Guinea, for example, we had estimated a leg at around two hours of driving. In reality, it took us more than seven hours, as the tracks were severely damaged by the rainy season, with sections that were almost impassable. This kind of gap completely changes the logic of an itinerary. At this stage, several tools become useful. – Wikiloc allows you to consult tracks shared by other travellers, often very close to real-world conditions, and helps identify tracks, passes, or lesser-known routes. – Tracks4Africa is particularly valuable in Africa for estimating realistic travel times on tracks. – And for those building more precise GPS routes, BaseCamp helps organise tracks and waypoints before departure. This is also where GPX files become important, as they allow itineraries to be transferred between different tools. Some useful terms to know Before going any further, here are a few terms that often come up when planning a trip : – Waypoint : a saved point on a map (campsite, fuel station, border crossing, viewpoint, etc.). – Track : a GPS path made up of successive points that allows you to follow a precise route. – Road : an itinerary automatically calculated by a navigation application. – POI (Point of Interest) : a useful or interesting location (campground, shop, natural site, etc.). – GPX : a file format used to share routes, tracks, and GPS points between applications. Building realistic travel days An itinerary is not built around distances or stops alone. A travel day also includes hikes, breaks, grocery runs, fatigue, and sometimes unexpected events. This is often where overly optimistic itineraries become difficult to maintain. During our road trip through the Dolomites, for example, we adopted a simple rhythm : hiking in the morning when conditions were at their best, before the heat and the crowds, then driving in the afternoon to reach a bivouac spot close to the following day’s point of interest. This type of organisation completely changes the way a trip feels. The itinerary becomes a series of balanced days rather than just a collection of points on a map. Planning overnight stops and resupply points Overnight stops play a central role when building an itinerary, even though they are often underestimated at first. Depending on the trip, they can take many forms : wild camping, campgrounds, homestays, or traditional accommodation.  To plan ahead, we mainly use iOverlander, which helps us find bivouac spots, campgrounds, hotels, water points, and fuel stations, all supported by reviews from other travellers. In Europe, Park4Night is also very useful for finding locations suitable for vans and overnight stops. These tools also help identify essential services along the way and adjust the itinerary according to real needs. We cover the process of finding and choosing bivouac spots in more detail in a dedicated article. Preparing and using navigation on the road Once the itinerary has been built, one essential step remains : making it usable in the real world. During the planning phase, Google Maps or sometimes BaseCamp help structure points of interest and lay the foundations of the route. We save locations, adjust the itinerary, visualise distances, and refine each stage of the journey. But once on the road, the approach changes completely. This is where the waypoints saved beforehand become truly valuable. They can be grouped, exported, or converted into GPX files to be
Lifestyle

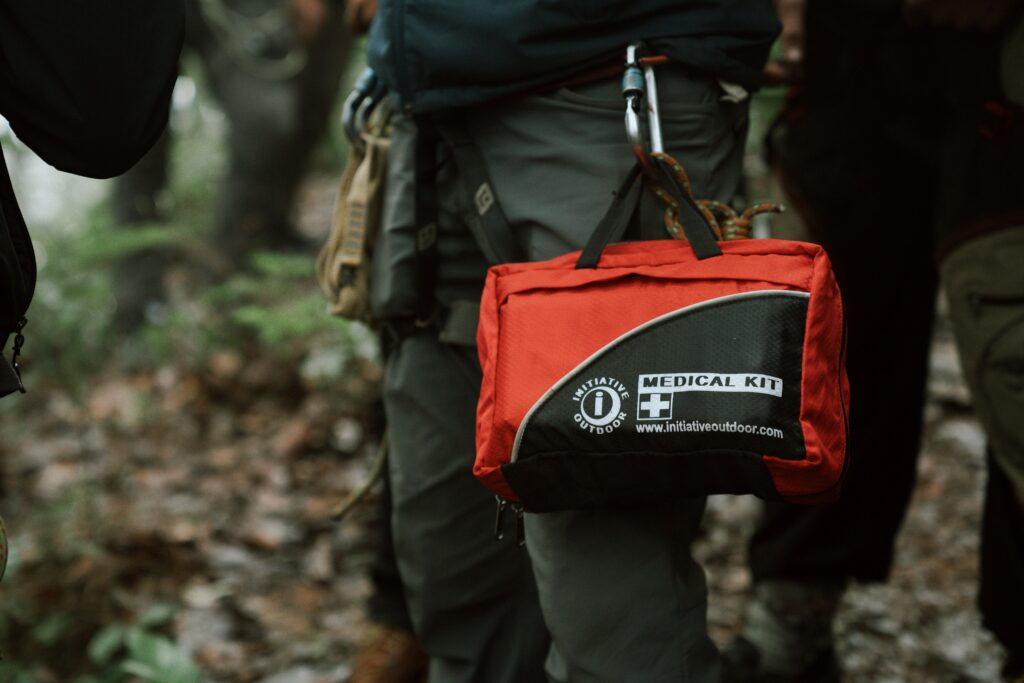
Our medical kit

A discreet essential, often overlooked… until the moment it becomes indispensable. In overlanding, most people focus on the vehicle, the route, or the camping setup. Yet one of the most important pieces of gear is often the most discreet : the medical kit. You won’t use it every day… until the moment it becomes essential. From minor day-to-day issues and digestive problems to unexpected situations far from any medical facility, it’s one of those things that mainly provides one thing : the ability to keep travelling with peace of mind. But the real challenge is not only what goes inside it. It’s how you prepare it, organise it, and adapt it to the type of journey ahead. Adapting Your Medical Kit to the Journey There’s no such thing as a universal travel medical kit. Its contents will always depend on the context : – the duration of the trip– the region you’re travelling through– access to medical care– the level of remoteness involved. A road trip across Europe, where medical facilities are only minutes away, obviously doesn’t require the same preparation as a long journey through remote areas of Southern Africa or anywhere far from a structured healthcare network. The goal isn’t to prepare for every possible scenario, but to cover the most likely situations in a practical and coherent way. In our case, the kit was prepared in advance with the help of our doctor, in order to adapt its contents to our itinerary. Before leaving, we also took the time to learn a few basic emergency procedures that can be useful in remote areas, including how to perform a simple suture if absolutely necessary. Of course, the goal was never to replace proper medical care, but simply to be able to handle a temporary situation before reaching professional treatment. We therefore carried only a minimal amount of basic equipment, strictly as an emergency backup. Important : every situation is different, and this article should never replace professional medical advice. Self-medication while travelling can be risky and should always be supervised by a healthcare professional. We also had access to remote consultations through our travel insurance, as well as a medical contact back in France if needed, which adds a real layer of reassurance when travelling far from home. Designing a useful, not overloaded kit Before leaving, like many travellers, we tended to overprepare. As a result, nearly 90% of our medical kit was never used… With hindsight, it highlights a simple reality : a good medical kit is not a complete one, but a relevant one. The goal is to focus on essentials, structure things intelligently, and avoid unnecessary accumulation that only makes the kit harder to use on the road. For this, we chose a simple organisation based on clear categories : – Digestive– ENT– Skin– Injuries– Gynaecology Each item was listed in a simple Excel file, with its name, dosage, and intended use depending on symptoms. It may sound basic, but in real travel conditions, when fatigue or stress set in, this kind of structure makes a real difference. For those who want to build their own system, we’ve made a simplified version of our preparation table available. Two levels of medical kit : Main and accessible Over time, we adopted a two-level system. The main medical kit is a full kit stored inside the vehicle, containing all medical supplies. It is organised in transparent, waterproof pouches, with clearly labelled categories for each type of care. The goal is to protect the contents while keeping everything easy to read and quickly accessible. Alongside this, we kept a smaller kit always within reach, mounted at the rear of the vehicle, containing only daily essentials : pain relief, disinfectant, plasters, digestive treatments, antihistamines, anti-nausea medication, and treatments adapted to the regions we were travelling through. This smaller kit allows for immediate response without having to open or reorganise the entire vehicle. When the medical kit is not enough There are situations where, despite careful preparation, a medical kit reaches its limits. In Namibia and later in South Africa, Étienne experienced a prolonged episode of digestive issues. Despite the treatments available in the kit, the condition did not improve and gradually became concerning. A decision was then made to seek medical care at a local clinic. This kind of situation is a reminder of an essential point : a medical kit is a first response, not a complete solution. It helps manage immediate issues, but it never replaces professional medical advice when a situation goes beyond a certain threshold. A medical kit in overlanding is not meant to be exhaustive. It should be clear, adapted, well organised, and medically validated. The goal is not to carry as much as possible, but to build a simple and efficient system tailored to your own way of travelling. Preparing a medical kit is ultimately about accepting that you can’t control everything, while still being ready to respond when needed. It’s about finding a balance between anticipation and simplicity. And as is often the case in overlanding, it’s the clearest and lightest systems that prove to be the most effective over time.

Gear

How to choose the right overlanding vehicle ?

How to choose the right overlanding vehicle without making the wrong choice ? That’s the real question ! Choosing a vehicle for overlanding has very little to do with style or image… well, almost. Let’s say it doesn’t, except maybe for the little eternal rivalry between “Land Rover people” and “Toyota people”. Beyond that, it’s above all a foundational decision that will shape your freedom, your comfort, your routes, and your ability to handle the unexpected. The problem is that many people make this choice based on an idealised vision of travel. In reality, on the road, it’s rarely the sunsets that cause issues, but rather rain, fatigue, breakdowns, or logistical constraints. Before even talking about models or modifications, it’s important to go back to a simple base : understanding how you actually want to travel. A choice that starts with your lifestyle Behind the choice of a vehicle lies, in reality, a lifestyle decision. Some people want to move every day, stay light, and stop easily wherever they feel like it. Others look for autonomy, the ability to stay in one place for several days, with a certain level of comfort. It’s this difference that explains why there are so many different setups. A 4×4 with a rooftop tent offers a high level of mobility and freedom. It’s a simple and efficient solution that allows you to go almost anywhere, but it also means accepting a lifestyle that is largely lived outdoors. At the opposite end of the spectrum, a fully fitted expedition truck offers a level of comfort close to a fixed home. You can live inside it independently from external conditions, but at the cost of reduced mobility and limited access to certain remote areas. Between these two extremes, there are intermediate options such as a pickup with a camper module, which provides real comfort while still remaining relatively versatile, or a fully equipped 4×4, which remains one of the most coherent choices for off-the-beaten-track travel. Vehicles like the Toyota Land Cruiser HZJ78 have become benchmarks for a simple reason : they strike a balance between robustness, load capacity, and modularity, while still being well suited to harsh environments for off-road and remote travel. Interior set-up : simple storage or a real living space Beyond the type of vehicle, one important decision concerns the interior setup. Some people opt for a minimalist setup, designed purely as an optimised storage space. Everything is organised, each item has its place, but the vehicle is not really intended to be lived in. You might sleep inside it occasionally, but daily life still happens outside. This type of setup has clear advantages : it keeps the vehicle light, simple, and capable off-road. It also reduces technical constraints and the risks that come with a more complex build. But it also means a strong dependence on external conditions. On the other end, others choose to make their vehicle truly liveable. This often involves a pop-top roof, usable interior height, and a space that allows you to cook, sit, and shelter properly. This choice brings obvious comfort, but above all a sense of continuity in the journey. You are no longer forced to adapt your entire daily life around the weather or external conditions just to function normally. We experienced this very concretely at the Black Rocks in Angola. The weather had been stable, then rain suddenly came down on us without warning. In situations like this, everything that normally happens outside quickly becomes complicated (relaxing, cooking, washing…). Being able to simply take shelter and keep cooking inside completely changes the experience. It’s no longer a constraint, just an adaptation. Choices that open… or close possibilities The vehicle you choose won’t only influence your comfort, it will also determine where you can go. We met a British traveller in Nigeria who was driving down from London in a simple panel van, two-wheel drive, with no off-road modifications. His journey was still impressive, and it clearly shows that you can do a lot with very little. But he himself admitted a key limitation: he had to give up many tracks and certain places simply because his vehicle couldn’t handle them. He was essentially limited to well-maintained roads. This example sums up something that is often overlooked. All choices are possible, but none are neutral. Every setup opens certain doors, while closing others. Budget : a false problem, but a real trap Tu peux regarder nos accessoires et nos équipements préférés et utiles pour un roadtrip réussi ! Le vrai enjeu n’est pas de dépenser beaucoup, mais de dépenser intelligemment. The budget is often seen as a barrier to entry. Many people think you need to invest tens of thousands of euros to set off, with a fully equipped vehicle. In reality, that’s rarely necessary. It’s entirely possible to start with a simple, lightly modified vehicle, as long as you make thoughtful choices and avoid unnecessary extras. Proper maintenance, suitable tyres, a coherent setup, and a few essential items are already enough to travel far. On the other hand, a heavily equipped vehicle that is poorly thought out can quickly become a constraint. The more equipment you add, the more weight, complexity, and potential points of failure you introduce. And here’s a small confession: I’m the first to love gadgets and accessories. Every new product is tempting, especially when it promises to “make travel easier”. But the reality is that you sometimes have to hold yourself back. Otherwise, the budget quickly spirals on things that rarely prove useful in the field. You can take a look at our favourite gear and essential accessories for a successful road trip in these two dedicated guides. The real challenge is not spending more, but spending wisely. Simplicity or technology : a real on-the-ground question Another key aspect concerns the level of technology in the vehicle. Modern vehicles bring comfort, safety, and superior performance. But this complexity quickly becomes a weakness as soon as you move away from well-established networks. An

Gear

Our Top 5 favorite accessories

What accessories really made a difference on the road ? Here’s our hands-on feedback from real-world travel. When preparing an overlanding trip, we often focus on the “big” gear : rooftop tents, fridges, vehicle setups… But after several road trips, we can tell you one thing : it’s often the small accessories that make the biggest difference in everyday life.The ones you use every single day.The ones that save you from small headaches.The ones you’re genuinely glad to have when conditions get a bit more extreme.Heat, dust, humidity, rough roads — everything we carry has been put to the test.In this article, we’re sharing the 5 accessories we would take again without hesitation. 1/ The Flextail x OuTask telescopic lantern This portable lamp is highly versatile and particularly well suited for bivouac and overlanding. Thanks to its telescopic design, it can be used as a standing lamp, a table lamp, or a more compact light depending on your needs. It offers several lighting modes (adjustable brightness, warm or cold light, SOS mode), making it useful in many everyday travel situations. Its battery provides excellent autonomy and can also be used to charge other devices : a real plus on the road. Built to withstand demanding conditions (dust, humidity, heavy use), it is rated IPX6 and IPX7. Now, that may sound more like a Wi-Fi password than anything else, but in practice it simply means the lamp handles rain, splashes, and even temporary immersion without any issue. In short, not exactly the kind of gear that’s afraid of a wet evening at camp. Our real-world use We used this lamp every single day during our last 6-month road trip. At camp, it mainly came into play in the evenings to light up our outdoor meals. We actually found it a perfect makeshift setup in a MOLLE bottle holder mounted on the rear door of the Toy, keeping it always within easy reach. From there, it would light up the entire cooking area, set up on the rear door alongside our table. Inside the vehicle, it proved just as useful. In the evenings, before going to sleep, it helped us wind down and finish the day in a comfortable atmosphere. Being able to adjust both brightness and colour temperature really made a difference : we almost always went for a warm, low-intensity light, which created a much more pleasant vibe inside the 4×4. But its use wasn’t limited to bivouacs. During our last trip across Africa, we sometimes stayed in places where electricity was unstable or even non-existent. In Congo, for example, we spent time in a house where power cuts could last for hours… sometimes even a full day. We ended up cooking in the kitchen on a gas stove, simply lit by the OuTask. An unexpected situation that quickly became part of daily life as the journey went on. In Togo, on a collaborative farm where electricity was very unreliable, it accompanied us through several evenings shared with the people we met there. It provided the perfect lighting for simple moments together, without relying on the power grid. The lantern mode, thanks to its telescopic stand, also proved particularly useful. Once deployed, it could easily light up an entire area around the camp (for example, to help keep snakes at a distance). Looking back, it’s clearly one of the most used accessories of the whole trip, and one that contributed the most to our day-to-day comfort. We’ve added a link to the model here if you want to check it out (affiliate link — it helps support the site at no extra cost to you). 2/ The Leatherman multitool The Leatherman multi-tool is one of those pieces of gear you end up using far more often than expected when overlanding. Compact and built to last, it’s designed to handle both travel use and everyday repairs on the road. It brings together 18 essential tools (depending on the model) in a single format : pliers, replaceable wire cutters, straight and serrated blades, saw, spring-action scissors, file, ruler, can opener, bottle opener, as well as multiple screwdriver bits. All tools are easy to access, even one-handed, which makes it particularly practical in real field conditions. Tough and built for durability, it’s a genuinely versatile tool for handling quick fixes and unexpected issues on the road. Our real-world use We used these multi-tool on a daily basis for a wide range of small but recurring situations on the road.From untangling particularly stubborn knots in our dog’s leash, to fully stripping down our Coleman stove for a deep clean, or tightening a screw or fitting when things needed to be fixed quickly without pulling out the entire tool kit. In overlanding, we all know vehicle storage often turns into a real-life game of Tetris, so having a tool that stays within easy reach makes a real difference. It’s exactly these kinds of small, unpredictable travel moments that keep coming back, where saving time and avoiding unnecessary setup becomes essential. After several months on the road, this has clearly become one of those pieces of gear you don’t want to be without. You can find the Leatherman pliers here : (your affiliate link) 3/ The Lifesaver jerrycan The LifeSaver jerrycan is a portable water purification system designed to make natural water sources (lakes, rivers, stagnant water) safe to drink. It can filter up to 20,000 litres of water by removing viruses, bacteria, parasites and other contaminants, without the need for any chemicals. With a capacity of around 18.5 liters, it provides a reliable water reserve while remaining suitable for travel use, whether for bivouacking, expeditions or remote areas. A dependable solution for securing access to safe drinking water, even in remote environments. Our real world-use The LifeSaver quickly became a key part of our self-sufficiency setup on the road. It’s definitely a fairly bulky piece of gear, but once you start travelling far from towns and infrastructure, you immediately understand why. In remote regions,

Scroll to Top